


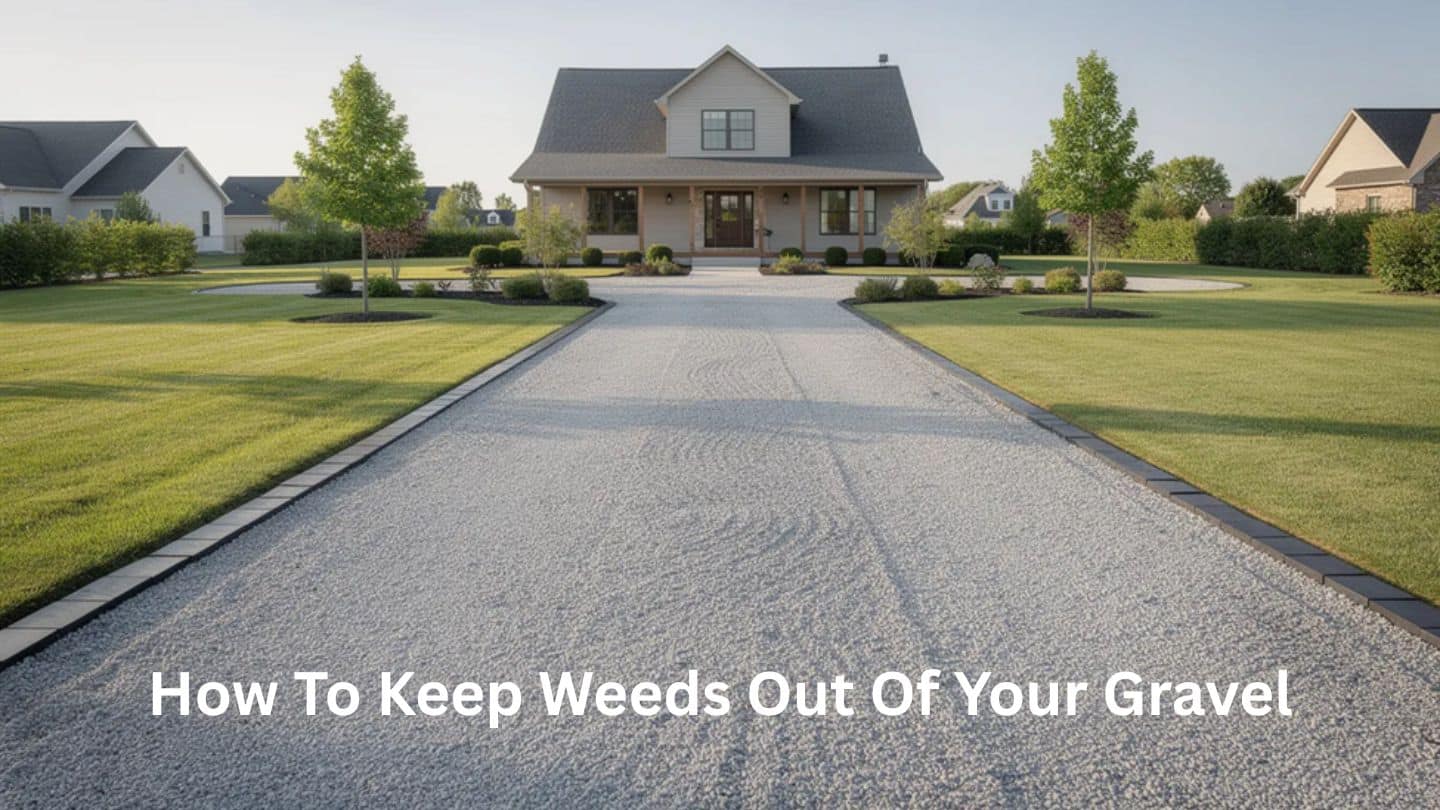
You put in the work to create a beautiful gravel driveway or path, and now dandelions are poking through like they own the place. Frustrating? Absolutely. But here’s the good news: keeping weeds out of your gravel isn’t complicated once you understand why they show up and which methods actually work.
Whether you’re dealing with an existing weed problem or planning a new gravel installation, this blog walks you through practical, proven strategies. We’ll cover quick removal options you can tackle this weekend, prevention techniques that pay off for years, and the ongoing maintenance that keeps everything looking sharp.
Key Takeaways
- Weeds appear in gravel because wind, birds, and vehicle traffic constantly drop weed seeds between stones, but you can both clear existing weeds and dramatically cut down new ones with the right approach.
- The fastest ways to kill weeds in gravel today are hand pulling, a weed torch, strong vinegar, or a selective herbicide, and long-term success depends on landscape fabric and solid edging.
- For brand-new gravel areas, installing a geotextile fabric and maintaining at least 2–3 inches of gravel depth is the most reliable “start clean, stay clean” strategy.
- No method is 100% permanent: regular light maintenance (10–20 minutes every couple of weeks during the growing season) is what actually keeps gravel driveways and paths weed-free.
- Combining 2–3 methods (like a weed burner plus hand weeding plus a spring pre-emergent) works far better than relying on a single product or tool.
Why Gravel Gets Weeds (Even If You Did Everything “Right”)
Picture a typical suburban gravel driveway or decorative gravel bed. It starts out pristine, clean stones, crisp edges, not a plant in sight. Fast forward a season or two, and weeds move in despite gravel’s many advantages, reminding homeowners that even with the benefits of gravel in your garden, maintenance and prevention still matter. What happened?
- Airborne seeds never stop arriving: Most gravel weeds start from seeds carried by wind (dandelion, thistle), dropped by birds, or washed in from nearby lawn edges and flower beds. One mature dandelion can release 15,000 seeds, and they travel.
- Organic debris creates a mini growing medium: Dust, decomposed leaves, and blown soil settle between gravel stones over months. This creates a thin “potting soil” layer right on top of your base where seeds can germinate surprisingly well.
- No fabric is perfect forever: Even with landscape fabric installed, any tear, overlap gap, or spot where gravel is thin lets tough perennials like plantain or dock push through over several seasons. Fabric typically lasts 7–10 years in high-traffic areas before needing replacement.
- Different weeds behave differently: Annual weeds like chickweed and crabgrass sprout shallowly and die after one season. Perennial weeds like dandelion, clover, and horsetail develop deep, persistent roots under the gravel that survive winter and come back stronger.
- Climate matters more than you’d think. In wet climates, constant moisture in gravel encourages moss and weed seeds to thrive far more than in dry regions. Shaded areas are especially prone to green, slimy growth.
Common Weeds You’ll See in Gravel
Identifying what’s growing helps you choose the right removal method. A grassy weed responds differently from a broadleaf invader, and woody weeds require their own approach entirely.
- Woody seedlings – Small volunteer trees such as maple, ash, black locust, or mimosa pop up along gravel edges and near fences. Ignore them for a season, and they develop woody stems that are much harder to remove. Simply pull these when they’re young and tender.
- Grassy weeds – Crabgrass, Bermuda grass runners, couch grass, and sandbur creep in from nearby plants or germinate directly in gravel. They form clumps that catch more debris, making the weed problem worse over time. These often spread underground, so getting the whole weed, including roots, is critical.
- Broadleaf weeds – Broadleaf weeds like dandelion and plantain commonly appear in driveways, paths, and decorative gravel beds, especially when homeowners debate material choices such as gravel vs pebbles for garden pathways. Their broad weed leaves make them easy to spot and easy to target with post-emergent sprays.
- Spreading groundcovers – Invasive species like creeping Charlie or ivy can root in the thin soil layer over gravel and spread under cars, patio furniture, or stepping stones. They’re sneaky and require consistent attention.
- Moss and algae – In shaded, damp gravel (like on the north side of houses), green films and moss pads form. Beyond being unsightly, they make gravel slimy and slippery. These indicate a drainage or shade issue as much as a weed issue.
Quick Ways to Kill Weeds in Existing Gravel
Got visible weeds right now? Here are practical, step-by-step options you can tackle this weekend, from 100% manual to chemical and heat-based methods.
Hand Pulling
This is your best bet for light to moderate infestations and small patch areas. Water the area the evening before to soften the ground. Wear gloves and use a narrow weeder or fishtail tool to grab roots, wiggling to extract the taproot intact. Dispose of pulled weeds before they drop seeds; don’t just toss them aside.
Hand pulling is effective on 70–90% of annuals, though it’s time-consuming for larger areas (figure 1–2 hours per 100 square feet of weeded areas).
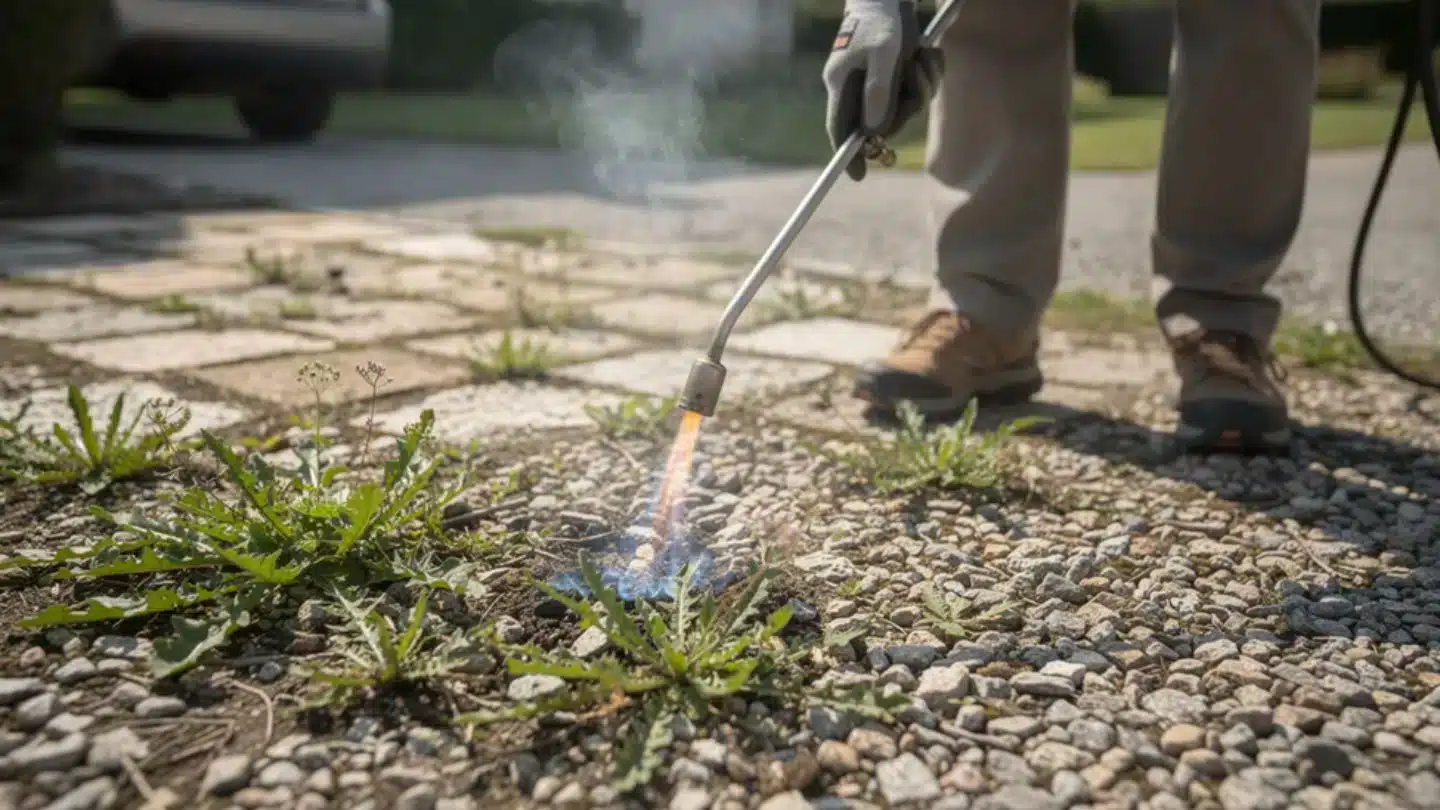
Weed Torch
A propane torch designed for weeds offers chemical-free control with satisfying results. Work on a calm, dry day. Pass the flame over weed leaves until they wilt; you’re not trying to set them ablaze or burn them to ash. The goal is thermal shock at around 140–180°F, which denatures proteins and kills the plant.
Rake away dead growth after 1–2 days. Sessions every 2–4 weeks during peak season maintain control. Be careful near structures, dry vegetation, and fuel sources. Avoid use when humidity drops below 20%.
Boiling Water
This low-tech method works well in tight spaces. Boil water in a kettle and carefully pour it directly onto the crown of weeds growing along gravel edges or between pavers. The 212°F temperature lyses plant cells on contact.
Boiling water works best on small, young weeds with shallow roots. Deep-rooted perennials may need follow-up digging, and you’ll likely need to repeat the treatment within 7–10 days for persistent growth.
Vinegar Solutions
There’s a big difference between household vinegar (5% acetic acid) and horticultural vinegar (20–30% concentration). For weed control in gravel, horticultural vinegar is far more effective.
A proven recipe: Mix 1 gallon of 20–30% horticultural vinegar with one cup of table salt and one tablespoon of Dawn dish soap (the dish soap acts as a surfactant to help the solution stick to weed leaves). Apply with a spray bottle on a warm, sunny day for best results. This mixture kills 85–95% of broadleaf weeds in 2–7 days.
Protect your eyes and skin, this is strong stuff. Note that perennials often regrow from roots, so repeat applications may be needed. Saltwater solutions persist in soil for 6–18 months, so be careful about overuse near trees, lawn areas, or your garden.
Selective and Non-Selective Herbicides
Non-selective weed killer products (glyphosate-type or acetic-acid-based) are most common on gravel since there’s no “good” vegetation to protect. You can spray Roundup or similar products, following label directions strictly.
Apply on a calm day to prevent drift onto nearby plants. Keep children and pets off treated areas until dry. Never spray near storm drains or ditches where runoff could contaminate waterways.
For an environmentally friendly option, look for pelargonic-acid-based products that provide contact kill without long residuals.
Small Tool Work
For lightly infested gravel beds, a stirrup hoe or hand hoe works well. Skim just under the gravel surface to sever seedlings at the root zone. Avoid digging deep into the base, you don’t want to disturb compacted material or create voids where more dirt and seeds can settle.
How to Prevent Weeds in New Gravel Installations
It’s far easier to build a weed-resistant gravel path or gravel drive correctly from the start than to fight weeds for years afterward, especially when weighing long-term performance like gravel vs concrete driveways during early project planning. A little extra effort during installation pays dividends every season.
Site Preparation
Strip existing sod and weeds down to bare soil. Remove roots and rhizomes from aggressive grasses like Bermuda, if the grass grows back from root fragments, you’ll have problems later. Grade the area for proper drainage so water flows away rather than pooling.
Base Layer
For driveways with vehicle traffic, add at least 3–4 inches of compacted crushed stone (crusher run or ¾-inch minus works well). For light-use paths, 2–3 inches is sufficient. A firm, well-compacted base leaves fewer voids for soil and seeds to accumulate.
Run a plate compactor or hand tamper over the base until it’s solid. This step is just a matter of taking the time to do it right.
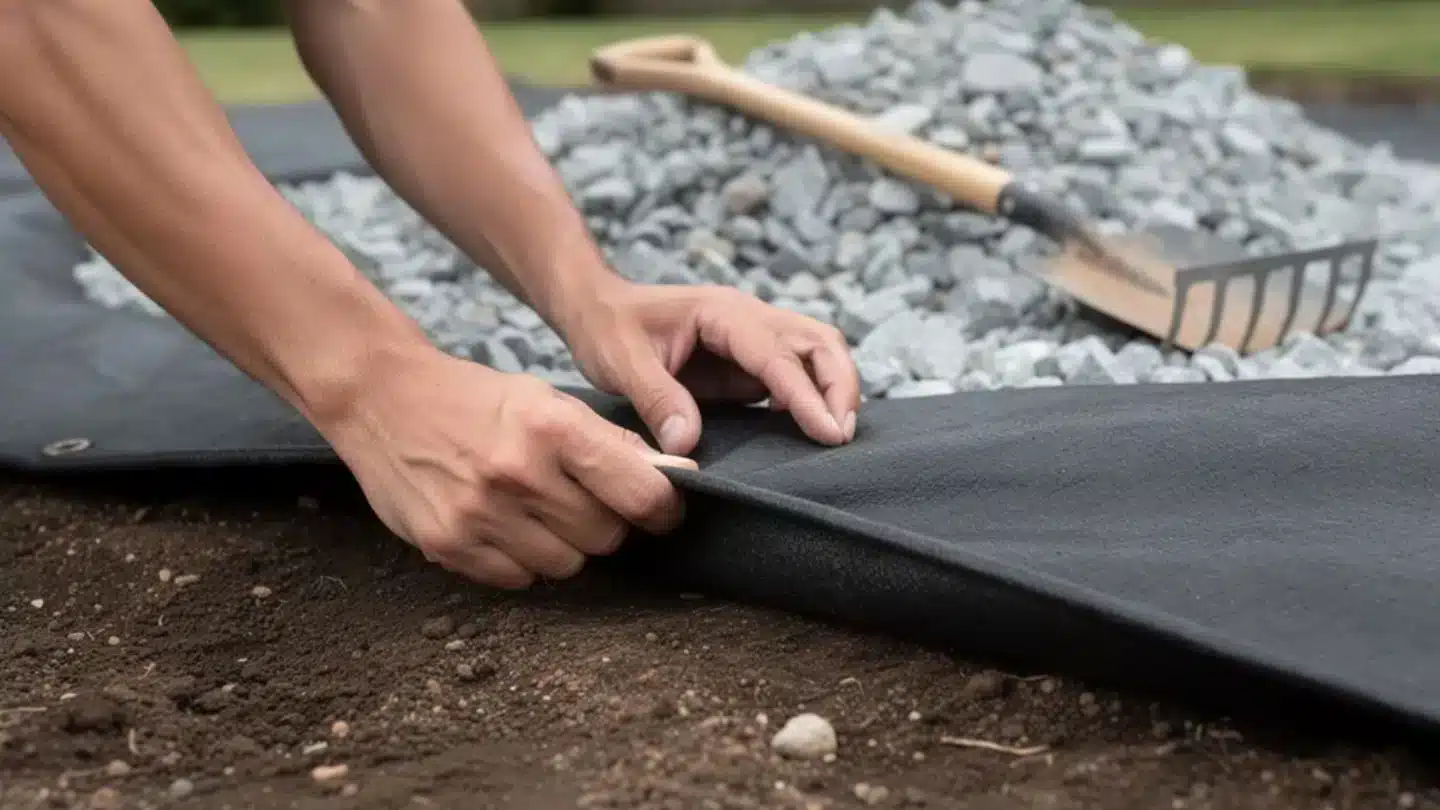
Landscape Fabric or Geotextile
Choose a heavy-duty, woven geotextile rated for driveways or paths (3–4 oz weight minimum). Lay it taut with 6–8 inch overlaps at seams, and pin seams every 18–24 inches with landscape staples to prevent gaps.
Quality fabric blocks light to prevent photosynthesis while remaining permeable to water. When installed properly, this barrier reduces weed emergence by 80–95% over five years.
Gravel Depth and Size
Maintain at least 2–3 inches of decorative gravel in beds and 2–4 inches of surface gravel on drives, and choose stone carefully since performance varies greatly based on gravel size for landscaping projects. Use angular stone (like crushed granite or gravel stones) rather than round pea gravel; angular pieces lock together and resist disturbance from foot traffic or rain.
Loose gravel that shifts constantly exposes fabric and creates low spots where debris accumulates.
Edging and Borders
Install metal, brick, concrete, or plastic edging between your lawn and gravel. This physical barrier stops creeping grasses like Bermuda or couch grass from running straight into the stone layer.
A clean edge also makes string trimmer maintenance safer and prevents decorative stones from migrating into lawn areas where they can damage mower blades.
Initial Weed-Free Finish
For projects started in early spring, inspect the finished gravel every few days for the first month. Pull any seedlings while they’re tiny, before roots establish. This takes just a few minutes and prevents a much bigger weed problem later.
When to Call in a Professional for Gravel Weed Control
Some gravel areas, long driveways stretching hundreds of feet, commercial parking pads, or rental properties, are simply too large or time-consuming for DIY efforts. Here’s when professional help makes sense.
- Large or recurring infestations – If weeds keep returning thickly every 4–6 weeks despite your efforts, a pro can diagnose underlying issues like inadequate base, poor drainage, or failing fabric. Sometimes the fix requires removing and reinstalling gravel properly.
- Difficult or invasive species – Get professional help if your gravel is infested with deeply rooted or regulated species like Japanese knotweed, horsetail, or invasive woody saplings along fences. These require specialized treatment.
- Access to commercial products – Licensed applicators may use stronger, longer-lasting formulations not available to homeowners. They can calibrate sprayers for even coverage over big areas and know proper application rates.
- Safety and liability – Pros are trained to avoid runoff into waterways, protect nearby plantings like your garden and trees, and follow local rules on open-flame tools and restricted-use chemicals.
- Maintenance contracts – Many landscape companies offer seasonal service plans that include periodic gravel weed removal, edging, and debris blowing. For busy homeowners with a long driveway, this can be cost-effective versus piecemeal visits.
Long-Term Weed Control Starts with the Right Foundation
Keeping weeds out of gravel is less about constant removal and more about smart setup and consistent light maintenance. Proper depth, quality fabric, solid edging, and timely upkeep work together to limit weed growth. When installed correctly, gravel surfaces stay cleaner, last longer, and require far less ongoing effort.
At Mulch Pros, we help homeowners achieve long-lasting results with professional materials and guidance, including high-quality gravel in Cumming for paths, driveways, and landscape features. We also provide mulch, pine straw, and soil that create durable, low-maintenance outdoor spaces tailored to different functional needs. If you’re ready to reduce maintenance and improve your outdoor spaces, we’re here to help you choose the right solution with confidence.
Frequently Asked Questions
How deep should gravel be to discourage weeds?
Most residential projects need at least 2–3 inches of gravel over a solid base, while driveways perform better with 3–4 inches. Shallow gravel allows roots to reach the soil and fabric to the surface. Proper depth helps, but it works best alongside fabric and edging.
Can I use regular table salt to keep weeds out of gravel?
Salt can kill weeds in small, contained areas, but it damages soil, harms nearby plants, and contaminates runoff. Rock salt may work temporarily, yet residues persist for months. Use sparingly and only where vegetation and drainage impacts are not concerns.
Will pressure washing remove weeds from gravel?
Pressure washing removes surface debris and weak seedlings but usually fails to remove roots. It can also scatter gravel and wash away fines. It’s better used for adjacent hard surfaces, not as a primary weed-control method in loose gravel areas.
Is it worth installing fabric under old gravel that already has weeds?
For heavily infested areas, the most effective solution is removing or scraping back gravel, installing geotextile fabric, and re-laying stone. Placing fabric over existing weeds rarely works because soil, roots, and seeds remain above the barrier.
How often should I expect to weed a gravel area if it’s set up properly?
With proper base preparation, fabric, and edging, maintenance is minimal. Many homeowners spend 10–20 minutes every 2–3 weeks during the growing season, plus a more thorough cleanup in late fall to keep gravel areas tidy.