


Gravel driveways in Milton take a beating over the winter months. Heavy winter rains and saturated red clay soils can shift gravel, create potholes, and weaken the driveway surface. By spring, many homeowners notice ruts, thin spots, and drainage problems that need attention before adding fresh gravel. Simply spreading a new layer isn’t enough; the key to long-lasting results is proper preparation. In this blog, we’ll walk through how to inspect your driveway, fix common winter damage, improve drainage, and properly prepare the surface so your spring gravel top-off holds up throughout the year.
Key Takeaways
- Early to mid-spring (March through May) is typically the ideal window in Milton to assess winter damage and prep your gravel driveway before adding a new layer.
- Proper prep work, including grading, drainage fixes, and pothole repair, matters more than simply dumping fresh gravel on top of existing problems.
- Milton’s heavy seasonal rainfall and moisture-retaining clay soils can gradually displace surface gravel each year, making regular inspections essential even if you don’t top off annually.
- Most driveways need a light gravel top-off every 1-3 years, but only after a thorough spring inspection reveals the true condition underneath.
- DIY homeowners can handle light prep and small driveways, but larger driveways or chronic drainage issues benefit from hiring local professionals.
Why Spring Is the Best Time for Gravel Top-Offs in Milton
Milton’s winters are rough on gravel driveways. Between heavy winter rainfall, saturated clay soils, and repeated temperature swings, your driveway takes a beating from late fall through early spring. By the time April rolls around, you’ll likely see the evidence: displaced stone pushed to the edges, potholes forming in high-traffic zones, and thin spots where the base layer is starting to show through.
Heavy rainfall, daily vehicle traffic, and shifting clay soils all contribute to surface wear. The weight of vehicles repeatedly driving over wet, saturated gravel can create washboard ridges and uneven surfaces that become more noticeable after heavy rains. That’s why spring inspection is so critical; you can finally see what you’re working with.
Spring in Milton (typically April through June) also brings heavy rainfall that tests your driveway’s drainage capabilities. This makes it the perfect moment to address grading issues before laying fresh gravel. If you fix problems now, the new material can settle and compact naturally through the driving season, improving long-term durability. Wait too long into summer, and you’ll be working with baked, hardened ground that makes regrading and compacting significantly more difficult.
Read More: How Gravel Can Improve Your Yard’s Drainage
Step 1: Inspect Your Driveway After Winter and Early Spring Rains
In Milton, GA, winter and early spring bring steady rainfall, saturated red clay soil, and occasional temperature swings that can quietly damage gravel driveways. Months of steady rainfall can lead to erosion, rutting, and soft spots that gradually worsen over time.
Before ordering new gravel, take time in early spring, typically March through April, to carefully inspect the entire driveway. This planning step is critical. Adding fresh stone without addressing underlying issues often leads to recurring problems within months.
| Problem Type | What to Look For | Priority Level |
| Potholes | Holes deeper than 2 inches or wider than 4 inches | High |
| Ruts | Depressions along tire tracks, especially on slopes or turns | High |
| Washouts | Erosion channels after heavy rain, particularly near edges | High |
| Soft Spots | Areas that feel spongy or muddy after storms | High |
| Thin Areas | Sections where the base layer or red clay is visible | Medium |
| Gravel Migration | Stone pushed downhill or into lawns and shoulders | Medium |
| Weed Growth | Vegetation emerging through the gravel surface | Low |
Pay special attention to high-traffic zones: the area in front of your garage, spots where vehicles turn or brake, and the driveway entrance where the most wear occurs. These are common spots needing attention during any top-off.
Take photos or quick notes to mark problem areas. This detail work helps you estimate how much gravel and labor will be required, and whether this is a DIY project or one that needs professional help.
Step 2: Check Drainage and Grading Before You Add New Gravel
Milton’s spring rains quickly reveal any drainage problems hiding beneath the surface. Poor drainage is one of the leading causes of gravel driveway failure. Fix these problems before adding new gravel, or you’ll just be throwing money into mud.
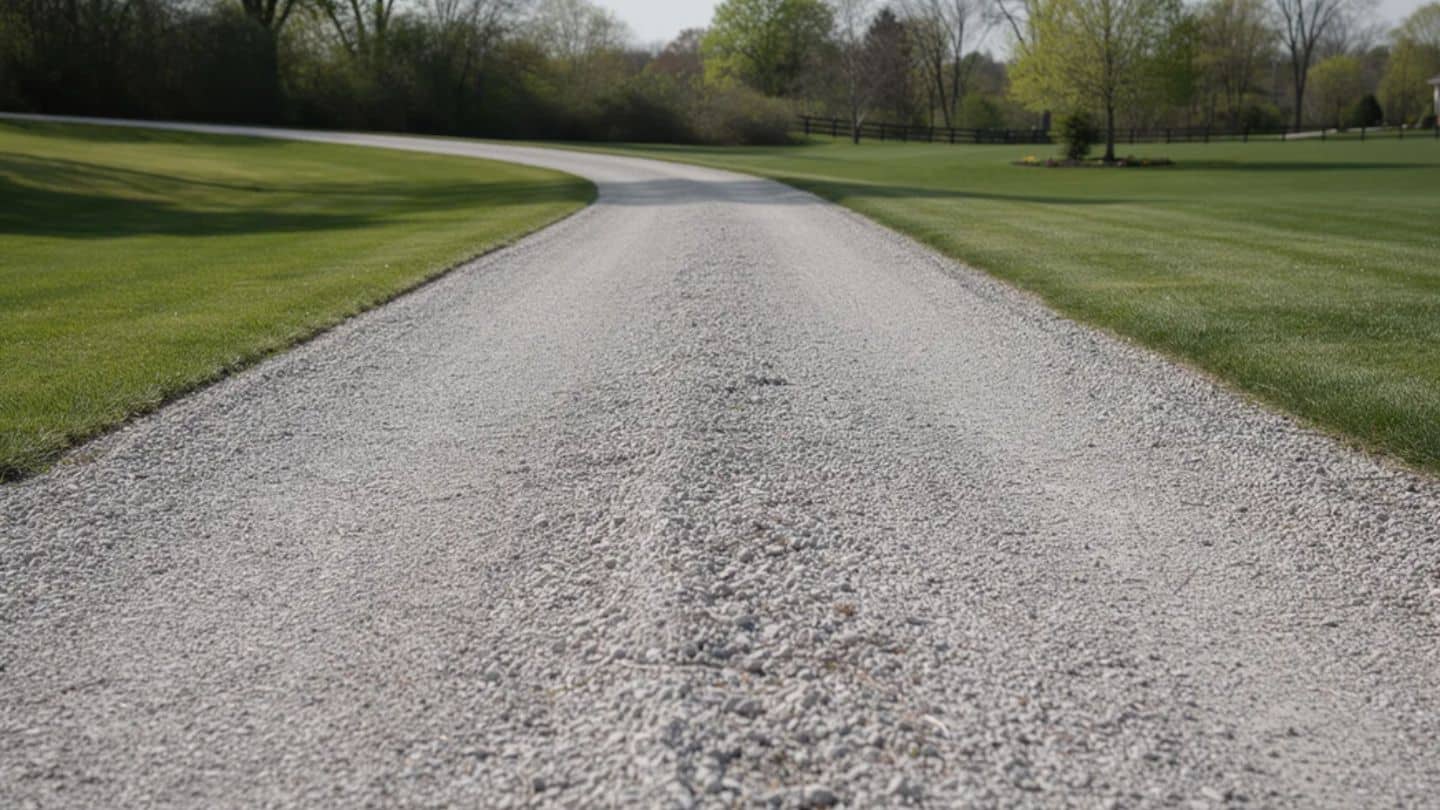
A properly crowned gravel driveway should be slightly higher in the center, with a 1-2% cross-slope toward the edges to shed water runoff. This gentle grade keeps water moving off the surface rather than pooling and soaking into the base.
Here’s how to assess your drainage situation:
- Inspect after a rain: Look for puddles that linger more than 24 hours, soft spongy spots, and erosion channels running down the drive
- Check side ditches and swales: Clear leaves and sediment so stormwater can flow away freely.
- Watch the direction of flow: Water should never run toward your house, garage, or neighboring properties
If water is pooling or flowing in the wrong direction, proper grading of the driveway and adjusting the slope is essential.
Step 3: Clean and Prepare the Surface
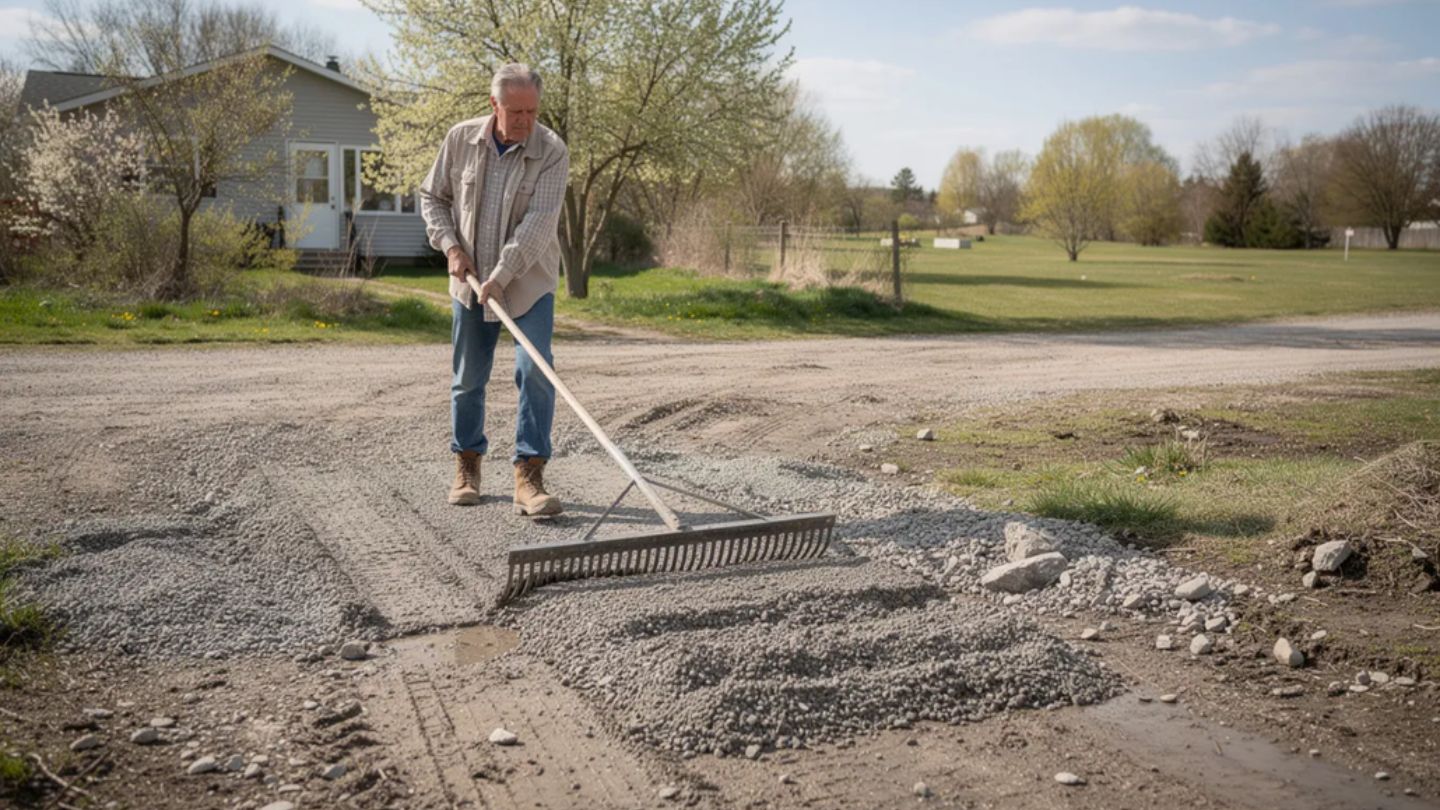
The existing surface must be clean and loose enough for the new gravel to bond and lock in properly. Skipping this step is like painting over dirt; the new layer won’t adhere and will migrate under traffic within months. Weed prevention also begins at this stage, as understanding how to keep weeds out of your gravel starts with properly clearing organic buildup and preparing a stable base before adding new material.
Start by removing debris: branches, leaves, sticks, and any trash that accumulated over winter. A stiff rake or leaf blower makes quick work of this on most properties. The goal is to see the true condition of your gravel layer without organic material hiding problems underneath.
Next, address these common issues:
- Storm debris: Remove any built-up mud, leaves, or washed-in sediment near the road edge so grading can be done evenly.
- Displaced gravel: Rake stone that’s migrated onto the lawn edges and shoulders back toward the center, starting to restore the crown shape
- Compacted crusts: Break up hard, washboard ridges with a landscaping rake, driveway grader, or ATV/tractor attachment
The surface should be relatively smooth and loose before any new stone is added. This allows the fresh gravel to interlock with existing material rather than sitting on top like a separate layer.
Step 4: Repair Potholes, Ruts, and Soft Spots
Simply dumping gravel into holes is one of the most common mistakes homeowners make. Without proper repair, that new material will sink, spread, or wash away within weeks. The damaged area must be rebuilt from the bottom up. Understanding the difference between gravel vs pebbles is important, as gravel’s angular edges provide better compaction and stability, while pebbles are typically smoother and more decorative in appearance.
Here’s the right process for pothole repair:
- Dig out the problem area: Remove mud, organic material, and loose stone down to firm material
- Backfill in layers: Use coarser gravel or crusher run, adding 4-inch lifts at a time
- Compact each lift: Use a hand tamper or plate compactor to achieve proper density
- Build slightly high: The repaired area should sit a bit above the surrounding surface to account for settling
For compacting to work properly, you need angular particles that interlock through friction and wedging. This is why round river rock makes a poor repair material; it rolls instead of locking together.
Long, deep ruts along tire tracks may require partial regrading of the whole lane rather than spot fixes. If you just fill the ruts without addressing the underlying grade, they’ll form again within a season as vehicles naturally follow the same paths.
Step 5: Decide How Much Gravel You Really Need
Top-offs are typically light applications, about 1-2 inches of depth. Overfilling can actually create problems, causing stone to scatter onto the road and requiring more frequent maintenance to manage edges.
To calculate your needs, measure your driveway:
| Measurement | How to Determine |
| Length | Total distance from the road to end point |
| Width | Average width including parking areas |
| Depth needed | Check how far below the ideal crown the surface has sunk. |
Use this formula to estimate volume: Length × Width × Depth × 1.35 (settling factor) = Cubic yards needed
As a general rule, plan for approximately 1 ton of gravel per 100 square feet at a 2-inch depth for standard crushed stone weighing 105 lbs per cubic foot.
Keep a small surplus on-site for mid-season pothole repairs. This is especially useful on rural Milton properties with longer lanes where wear patterns develop throughout the summer.
Read More: Effortless Project Planning—Calculate Your Exact Gravel Needs With Our Calculator!
Step 6: Choose the Right Gravel for a Milton Spring Top-Off
The best top-off stone matches or complements what’s already on your driveway. Choosing gravel that’s drastically different in size or color leads to patchy appearances and separation under traffic. When planning surface improvements, understanding the differences between gravel vs crushed stone becomes important, particularly during driveway renovation projects where compaction and durability directly affect long-term performance.
Here’s what works best:
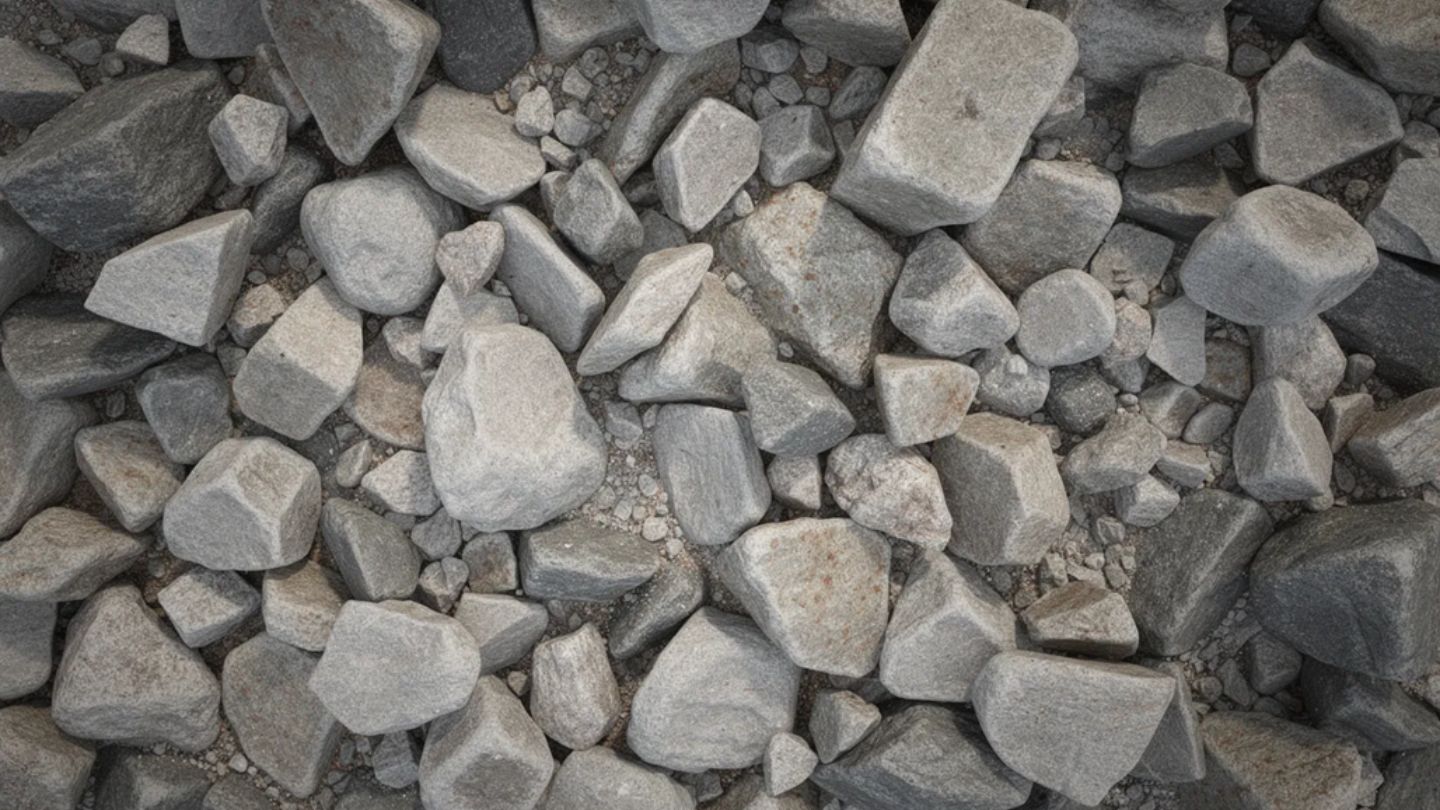
- Angular crushed stone: Typically, 3/4 inch (19mm) clean crushed gravel locks into the existing base instead of rolling around
- Consistent sizing: Mixing too many different sizes creates an unstable surface that separates under the weight of vehicles
- Appropriate fines content: Very fine materials like stone dust shouldn’t be used alone as the top layer, but a small amount in a blend helps bind the surface
Avoid round river rock for top-offs; it looks attractive, but doesn’t lock together and will roll under tires, creating ruts and bare spots quickly.
Source your material from a local Milton or North Fulton County supplier. Local stone is typically suited to regional soil and weather conditions, and you’ll save significantly on transport costs compared to having material trucked from further away.
Step 7: Plan for Professional Help vs. DIY
Not every driveway project needs professional help, but knowing when to call in experts saves time, money, and frustration in the long run. Different projects call for different aggregate specifications, as the performance requirements for driveways differ significantly from what is considered best gravel for a playground or recreational surface.
DIY-friendly tasks include:
- Surface raking and debris removal
- Light pothole repair with hand tamper
- Small top-offs on short residential driveways
- Edge maintenance and weed control
Consider hiring professionals when:
- Your driveway is longer than 200 feet
- You have chronic drainage issues or heavy washouts
- The base layer is unstable or is pumping water
- You need a truck delivery and mechanical spreading
- Major regrading with equipment like a box blade is required
If you’re installing more than a light top-off or dealing with base problems, professional equipment, plate compactors, skid steers, and grading attachments make a significant difference.
Milton contractors familiar with local soils and winter damage patterns can often combine delivery, regrading, compacting, and top-off in a single visit. That efficiency frequently costs less than renting multiple machines and spending a full weekend on the project yourself.
After the Top-Off: Simple Spring and Summer Maintenance
The first few weeks after a top-off are important for helping your driveway settle evenly. A little attention now prevents problems from developing as the season progresses. Gravel is not only functional for driveways but also plays a key role in modern landscape design, where knowing how to create gravel gardening layouts supports better drainage, structure, and long-term ease of maintenance.
Drive slowly and vary your wheel tracks for the first couple of weeks. This helps the new gravel compact uniformly rather than creating immediate ruts in the same spots. The natural weight of vehicles combined with spring rains will help settle the material into a durable surface.
Ongoing maintenance tips:
- Rake regularly: Pull gravel back from edges and fill minor low spots after heavy spring rains
- Monitor for puddles: Address new wet spots promptly before they become full potholes
- Mid-summer checkup: Remove weeds at edges, clear debris in ditches, confirm the crown is visible and functioning
- Watch for erosion: Heavy rainfall can create channels that worsen quickly if ignored
Regular maintenance extends your driveway’s life significantly. With proper care, a well-prepped gravel driveway can last 10-15 years with only biennial top-offs, compared to the expense and effort of more frequent major repairs.
Final Thoughts
Spring is the ideal time to restore your gravel driveway after winter wear. Heavy winter rains, saturated soil conditions, and seasonal temperature swings often leave behind potholes, ruts, thin spots, and drainage issues that must be addressed before adding fresh stone. Simply spreading new gravel won’t deliver long-lasting results; the key is proper preparation that promotes bonding and compaction. In this blog, we outline how to inspect for winter damage, fix grading problems, repair soft spots, and prepare the surface so your spring top-off performs well throughout the year.
At Mulch Pros, we offer high-quality materials to support outdoor projects, including dependable gravel in Milton, durable mulch, premium soil, protective pine straw, and reliable firewood. With the right supplies on hand, you can prep driveways, garden beds, and outdoor spaces for long-term performance and beauty.
Frequently Asked Questions
How often should I top off my gravel driveway in Milton?
Most Milton gravel driveways need a light top-off every 1-3 years, depending on traffic volume, slope, and winter damage severity. Shorter, lightly used driveways may go 3 years or more between applications, while longer rural lanes with regular delivery trucks or heavy use may need annual attention. Rather than following a strict calendar, use visible signs as your guide: exposed base material, frequent puddles that don’t drain, and thin sections where you can see ground through the gravel all indicate it’s time.
What is the best month to schedule a gravel top-off in Milton?
March through May is typically ideal for Milton. This timing allows the ground to dry out after winter rains but comes before intense summer heat hardens the surface. Spring moisture actually helps with compaction; the material settles better when the ground is damp. Avoid scheduling during extremely wet weeks when the sub-base remains saturated and unstable.
Can I top off my driveway if the base is soft or muddy?
Adding gravel on top of a soft, pumping base is not recommended; it’s essentially throwing money into a sinkhole. The new material will simply sink into the mud, creating recurring potholes within weeks. First, address the underlying drainage problem, remove saturated material by digging down to firm ground, and rebuild with coarser base gravel before adding any top layer. If large sections of your driveway stay muddy well into late spring, consider involving a local professional who can properly assess and fix the foundation issues.
Do I need a permit in Milton to regrade or top off my gravel driveway?
Simple maintenance and minor top-offs generally do not require a permit. However, major expansions, changes to the driveway entrance, or alterations that affect drainage patterns may require approval. Professional installers working in the area are typically familiar with local requirements and can advise on whether your specific project needs permits.
What equipment do I really need for a small DIY spring top-off?
For short residential driveways, basic tools will get the job done: a sturdy steel rake, a shovel, a wheelbarrow for moving material, and a hand tamper for compacting repairs. Renting a plate compactor or small power rake can significantly improve results on medium-sized driveways and help the new gravel lock in properly. For larger driveways or those with significant grading needs, hiring a contractor with a tractor, skid steer, or grading attachment often makes more sense than renting multiple machines and spending an entire weekend on the project.